Setting up and Managing a Workspace for Live Chat

The Workspace feature was introduced for effective access management of the knowledge base and live chat requests.
After setting up the Workspaces, admins and agents can be assigned according to the content(knowledge base and live chat) that they need access to. This is helpful when you have multiple departments using the same Rezolve.ai bot and Admin console or if you want to section off knowledge base creation.
Role Required
User Admin
Instructions
To configure and setup a Workspace is a 3-part process.
Part 1 Add Attributes
1. Go to Admin App
2. Select Attribute
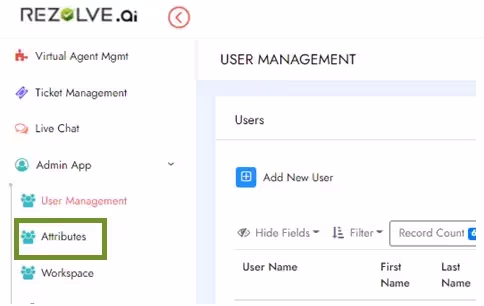
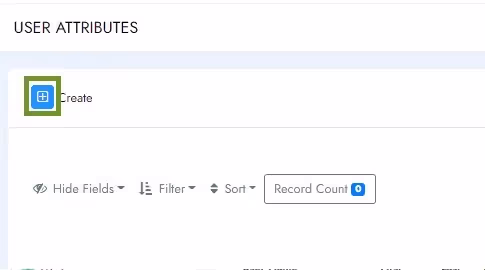
3. Click the + in front of Create
4. Fill out Attribute Name – Select something that will define your list i.e. Department, Location, Language etc

5. Select a Validation Rule – Attribute Type. (We recommend you use Predefined List.)
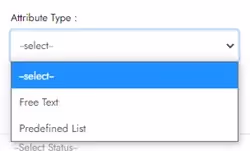
Predefined List
- When applying this attribute to someone’s profile it can only be selected from a predefined list.
Free Text
- When applying the attribute to someone’s profile it can be freely written
6. Select yes or no for Mandatory in User Profile (you decide if adding this attribute is mandatory or not)
7. Enter your values (the options to be chosen from your list) under Value
- To create a value, Enter your value and click the plus sign. Keep adding until done.
8. Select Yes or No for Allow Multiple Values (you decide if to allowing more than one value to be added to someone's profile)
9. Set the Status to Active
Example of what it should look like:
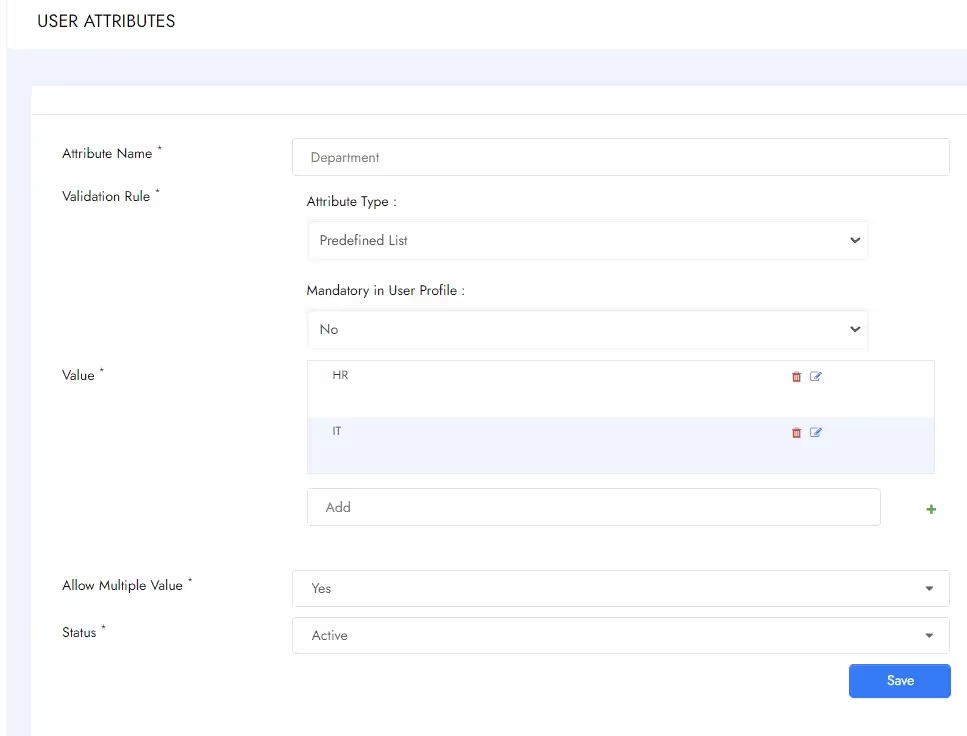
10.Click Save when done
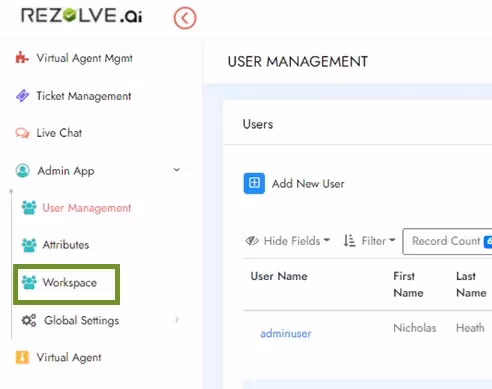
Part 2 Configure Workspace
1. Go to Admin App and then select Workspace
2.Click on the + next to Create
3.Type the name and label of the Workspace
4.Select livechat as the Workspace Type
- Admin needs to configure workspace for 'Virtual Agent Mgmt' and 'Live Chat'. separately.
5.Select the Role these user will have to that Workspace
- Edit - Create and edit
- Read - Read only. Cannot make changes
- Approve - Approve content creation
6.Under properties section
- Key - Enter the name of the Attribute that will define who has access to this Workspace
- Label - For the label box right next to Key, we recommend that the label should be the same as the Key
- Value - Enter the Attribute Value that will define who has access to this particular Workspace
- Label – for the label box right next to Value, we recommend that the label should be the same as the Value
7.Set the Status to Published
Example of what it should look like:
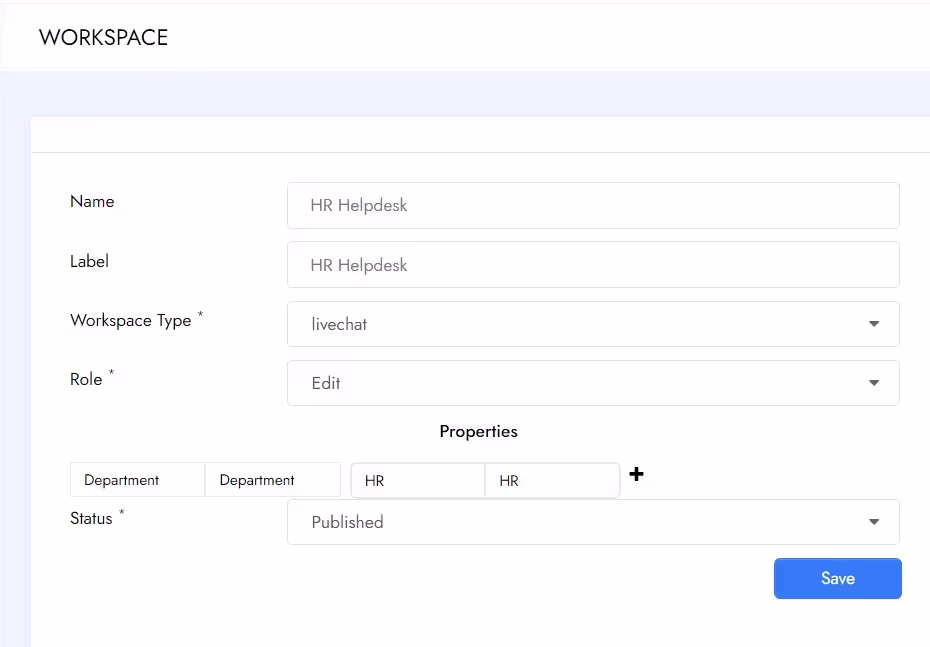
8.Click Save
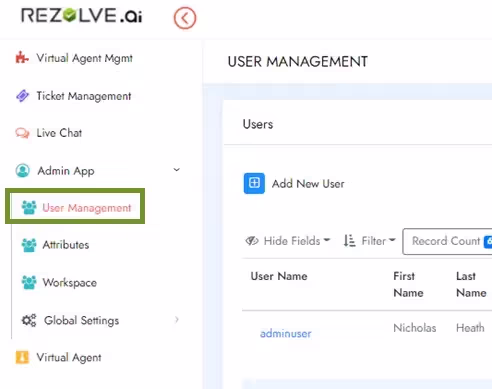
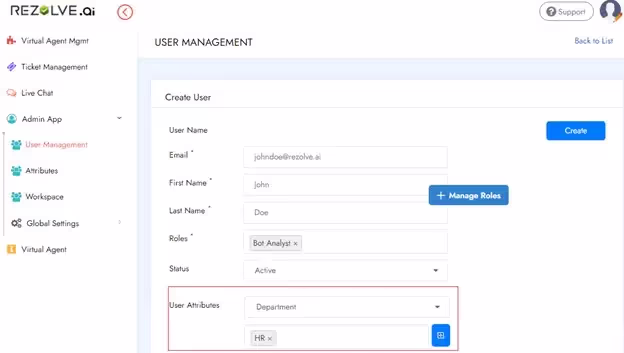
Part 3 Assigning Workspace to a user
The attribute added to a user's profile decides the Workspace access. For example, a user with attribute Department: IT will see the 'IT Workspace' only.
User Admin(s) can assign the required Attributes to the user profile for granting workspace access.
1.Go to Admin App and then select User Management
2.Select the person you would like to give Workspace access to or click + create if you are manually creating the account
3.Make sure all mandatory fields are filled
4.Assign to proper Live Chat role related to your Workspace type
- Chat Agent
- Chat Agent Admin
- Chat Agent Supervisor
5.Status should be Active
6.Select the corresponding Attribute from User Attribute dropdown
7.Select or enter the Value to assign to this user
8.Click the + to add the Value to the profile
9.Click Update or Save

Rezolve.ai is an enterprise Agentic AI solution that deploys specialist AI agents for IT and shared services to reduce cost, accelerate resolution, and elevate employee experience.