Ticketing 2.0 Updating a Ticket

Updating a ticket can involve:
✓ Changing the Subject of the ticket
✓ Changing the Description of the ticket
✓ Changing ticket properties such as Domain, Category, Subcategory.
✓ Change ticket priority
✓ Changing the “Assigned To” field.
✓ Changing of the “Requested For”.
✓ Add or Remove Watchers
✓ Add or Remove attachments
✓ Updating Status of the ticket using workflow button.
✓ Adding a Note
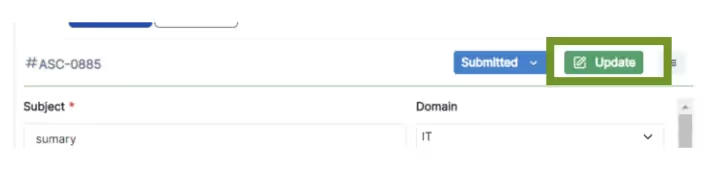
Updating Subject, Description, Domain, Category, Subcategory, Priority,Queue, Assigned To, or Requested for Fields
1. Open the ticket that you want to update
2. Make your changes to the desired field(s)
3. Click Update to save your changes when done
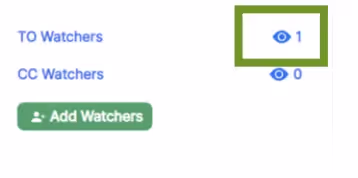
Add or Remove a Watcher
For instructions on adding a watcher please refer to Adding a watcher to a ticket.
To remove a watcher:
1. Open the ticket you want to add a watcher to and scroll down to the watcher section
2. Click on the icon of an eye next to ‘To Watcher' or 'CC Watcher'
3. Click the X next to the watcher you want to remove and click Update when done
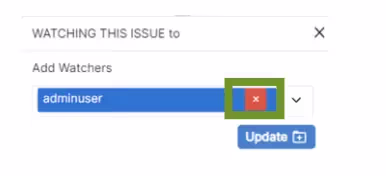
4. Click on Update at the top of the ticket to save your changes

Adding an Attachment
To add an attachment directly on the ticket:
1. Click Choose File under Attachment section header (found directly under ticket description)
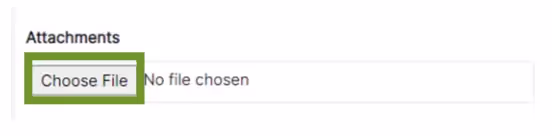
2. Browse your computer until you locate the file
3. Once you have found it click on it and the file will be added
Remove an Attachment
To remove an attachment that is saved directly on the ticket:
1. Go to the Attachment section (found directly under ticket description)
2. Click the trash can on the file you would like to delete
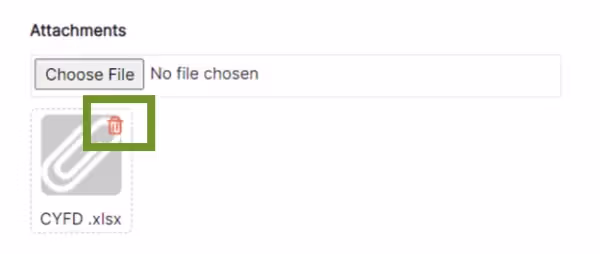
3. Click Confirm on confirmation pop-up and file will be removed
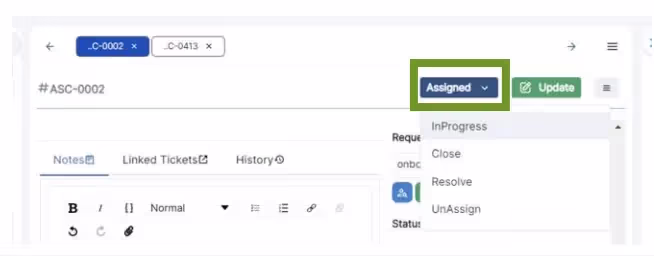
Changing Status of a Ticket
All tickets go through a cycle from creation to resolution. In Rezolve this is the Ticket Status workflow. The standard ticket status workflow for most tickets will be:
- Submitted - >Assigned ->InProgress ->Resolved - > Close / Reopen
To change at which point the ticket is at, click the Status workflow button and choose the correct one. The menu options you will see depends on the ticket’s current status. If a note is required forthe new status, you will be prompted to add one.
Adding a Note
1. Open the ticket that you want to add a note to
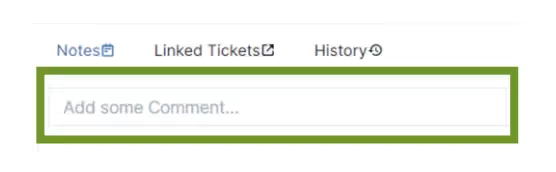
2. Scroll down to the Notes section found under attachments
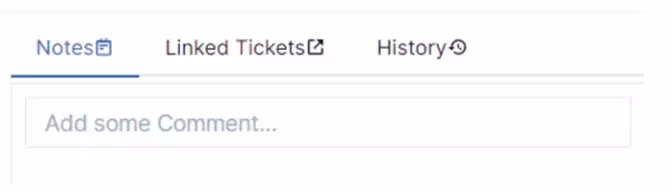
3. Make Sure the Notes tab is selected (writing will show in blue with a blue line under it)
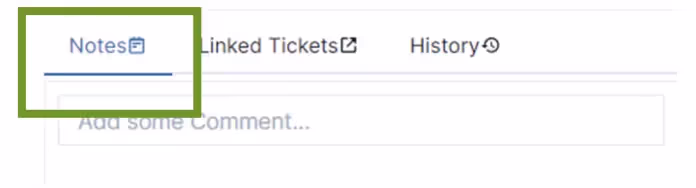
4. Click in the Add some Comment… box to expand the full Notes section
5. Write your Note
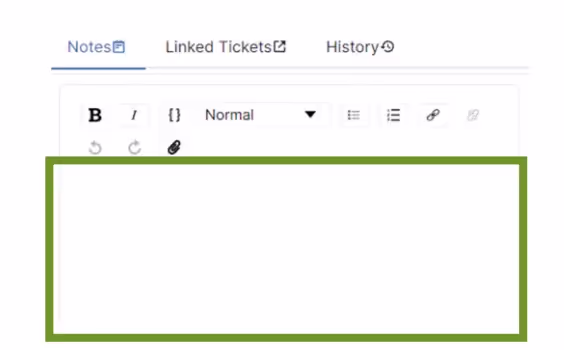
- You are allowed to copy and paste images directly into your notes
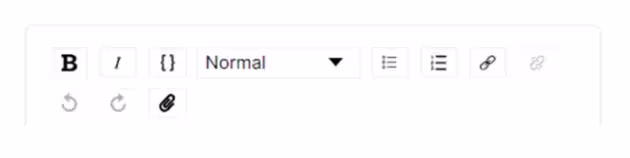
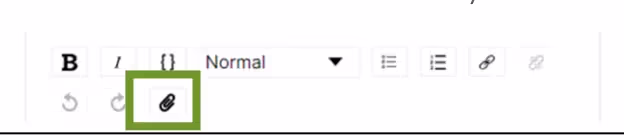
- You have a rich text editor toolbar that allows you to bold, italicize, use bullets, usenumbering, create links, attach a document etc to your note.
- You can add an attachment to a note by clicking on the paper clip. This will becomean attachment of the ticket email notification if you chose a note that sends one
6. Chose your note type
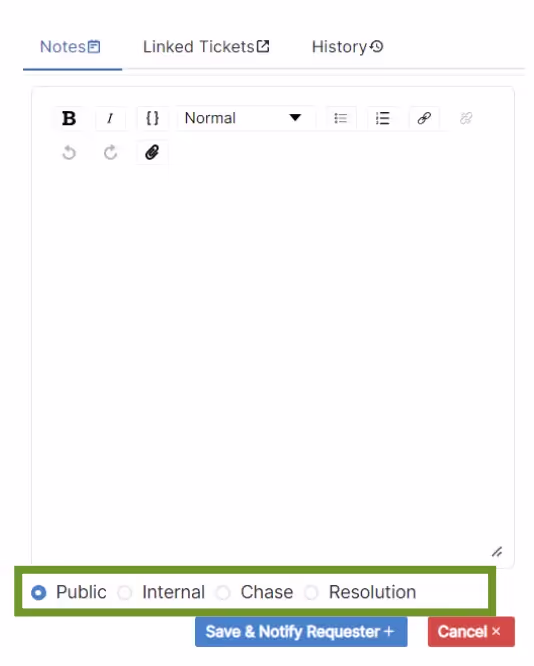
- Public Notes - These notes are visible to everyone who can view the ticket. Agents can use this note to notify the end-user.
- Internal Notes - These notes are only visible to Agents. Internal notes can be used for internal communications when you don't want to notify the end-user.
- Chase Notes - These notes are only visible to Agents when a chase note is added, it sends an email to the Assigned Agent and the Supervisor of the Assigned Agent. This can be used when the end-user contacts the support team for an update or further assistance on an existing ticket but the agent (currently speaking with the end-user) is unable to provide either.
- Resolution Notes - To resolve a ticket in a gif Agents can add a Resolution Note. When aResolution Note is added it notifies the end-user, moves tickets to 'Resolved' state, and bringsAgent to the ticket list screen.
7. Click on:
- Save & Notify Requester’ (when note type is Public)
- ‘Save’ (when note type is Internal)
- ‘Save & Escalate’ (when note type is Chase)
- ‘Save & Mark Resolved’ (when note type is Resolution)
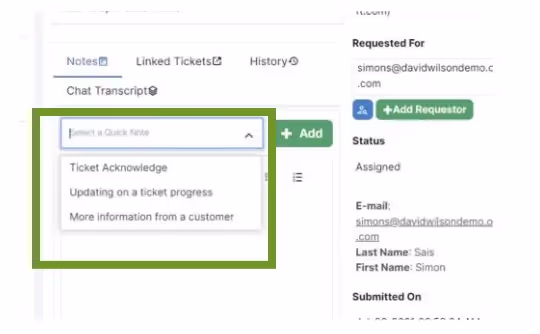
Quick Notes
Quick Notes are pre-defined notes created for all agents in a Team to use. These are typically notes that you constantly have to write up the same thing or templates for specific scenarios.
By default, you will get 3 Quick Notes:
1. Ticket Acknowledge – informs requestor that their ticket was received
2. Update on a ticket progress – informs the requestor that someone is actively working onthe ticket
3. More information from customer – requesting more information of the issue
Role Required to Create and Delete a Quick Note: Ticket Agent Supervisor

Rezolve.ai is an enterprise Agentic AI solution that deploys specialist AI agents for IT and shared services to reduce cost, accelerate resolution, and elevate employee experience.