Signup to access
Thank you! Your submission has been received!
Oops! Something went wrong while submitting the form.
Signup to access

Add an agent to a Live Chat Queue

1. For the user to act on Chats, we need to elevate their role and add “Chat Agent” from User Management. Once done, move to the next step.  

2. Navigate to Live chat - > Live chat settings - > Associate Agent(s) .  

3. Select the queue you want to add/remove members to by clicking on Edit (Pencil) sign under actions. 
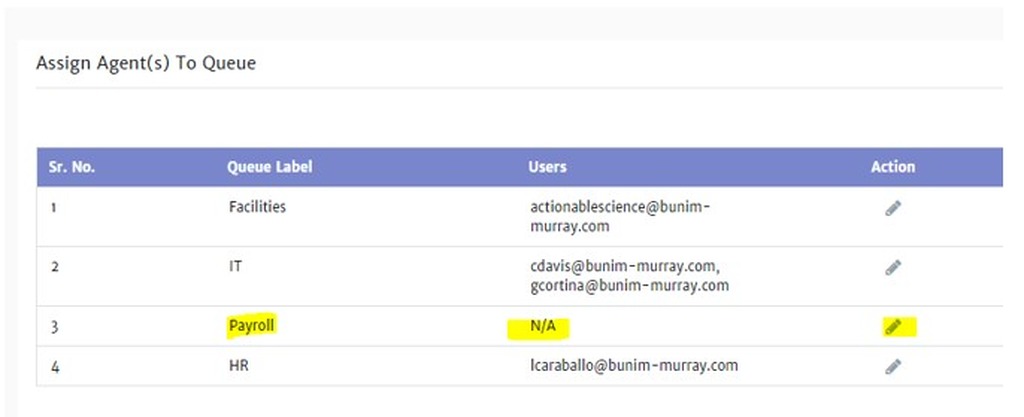
Image

4. Once you click on Edit, a new screen will open:
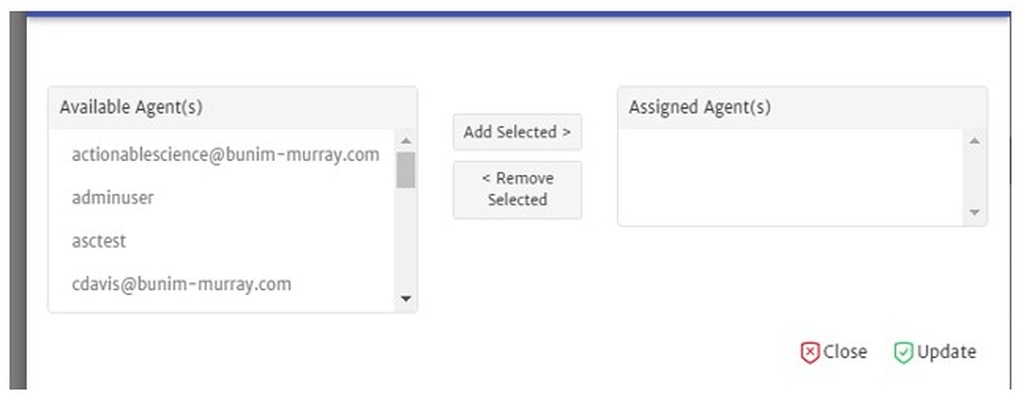
5. On the left-hand side, you will see all users who have a chat agent role and can be added in the queue.

6. Select the agent name on the left pane and click on Add Selected. The user will now move to the Assigned Agent(s).

7. Click on Update and you will be back on the Associate Agent(s) screen with the new user added for the queue and available under Users.

Download Document
Thank you! Your submission has been received!
Oops! Something went wrong while submitting the form.